Drifta Stockton
DRIFTA STOCKTON 60L PVC WATER BLADDER
DRIFTA STOCKTON 60L PVC WATER BLADDER
In stock
Couldn't load pickup availability
Parameters
Parameters
Material: PVC
Weight: 630g
Great way how to carry water with you on trips. Easy to store away once you have emptied it. Drink safe PVC. 2mm thickness, 630 gsm, for the pvc (3 layers, 2 layers of pvc and an inner layer of fabric).
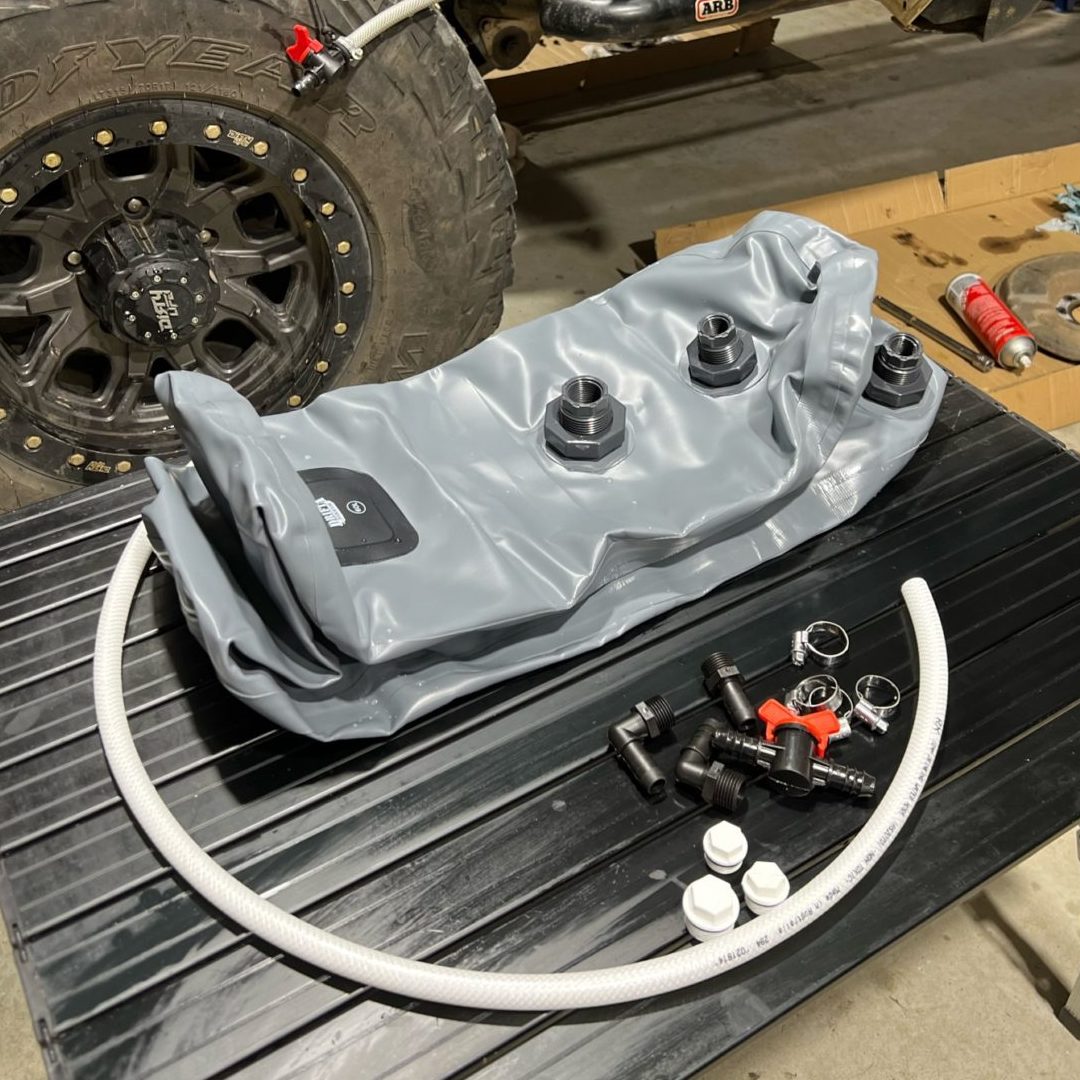
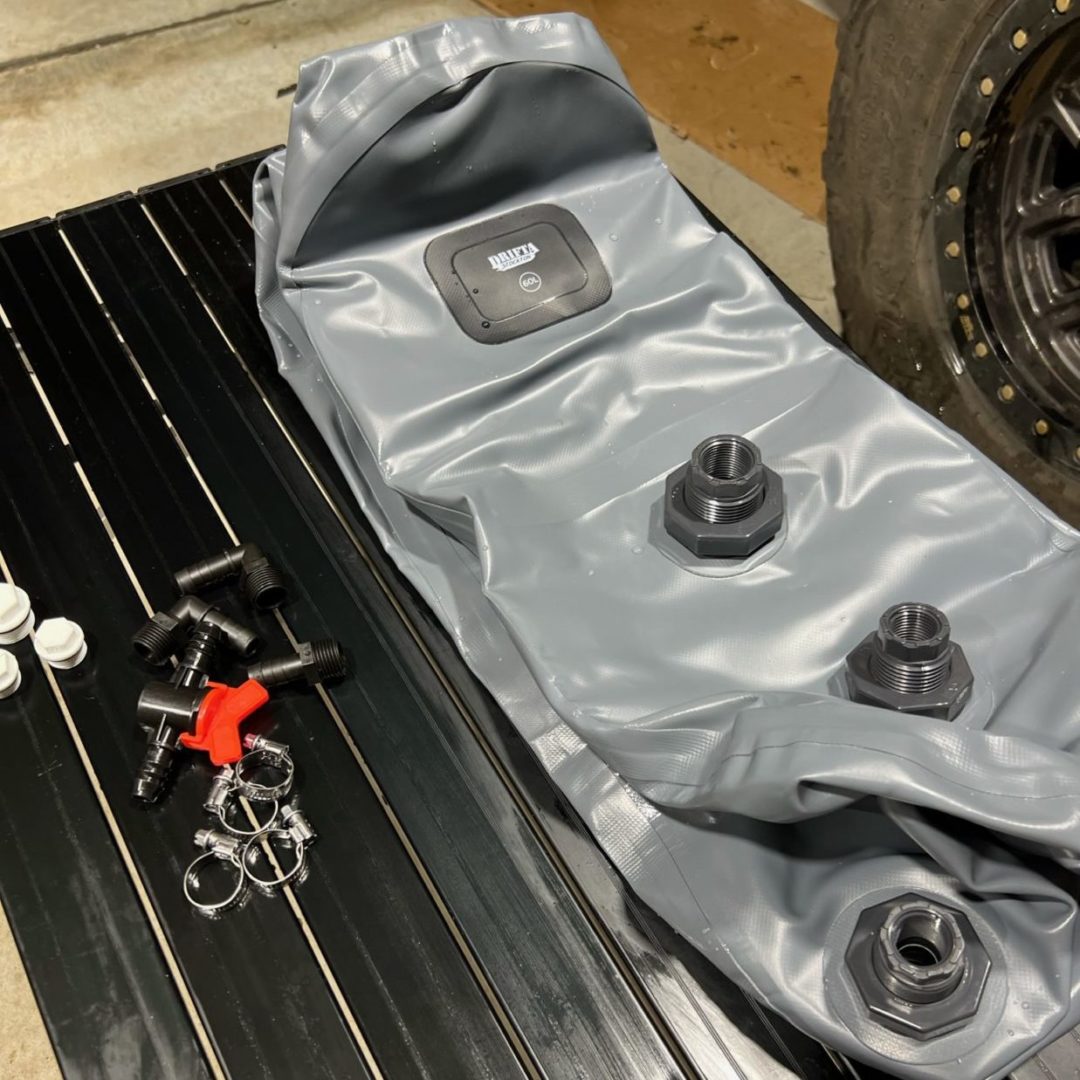
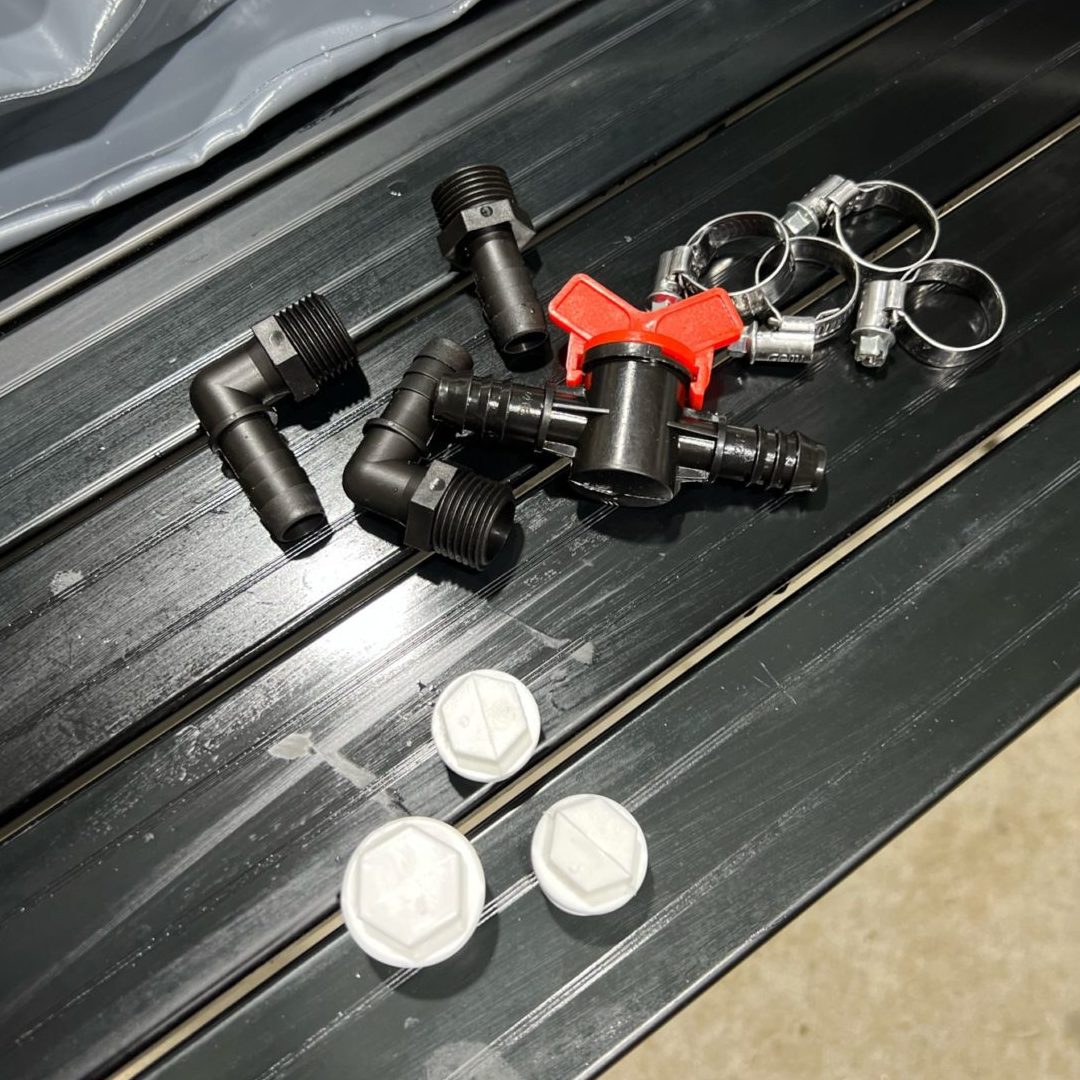
Fittings included
Set up size: 650x350x300
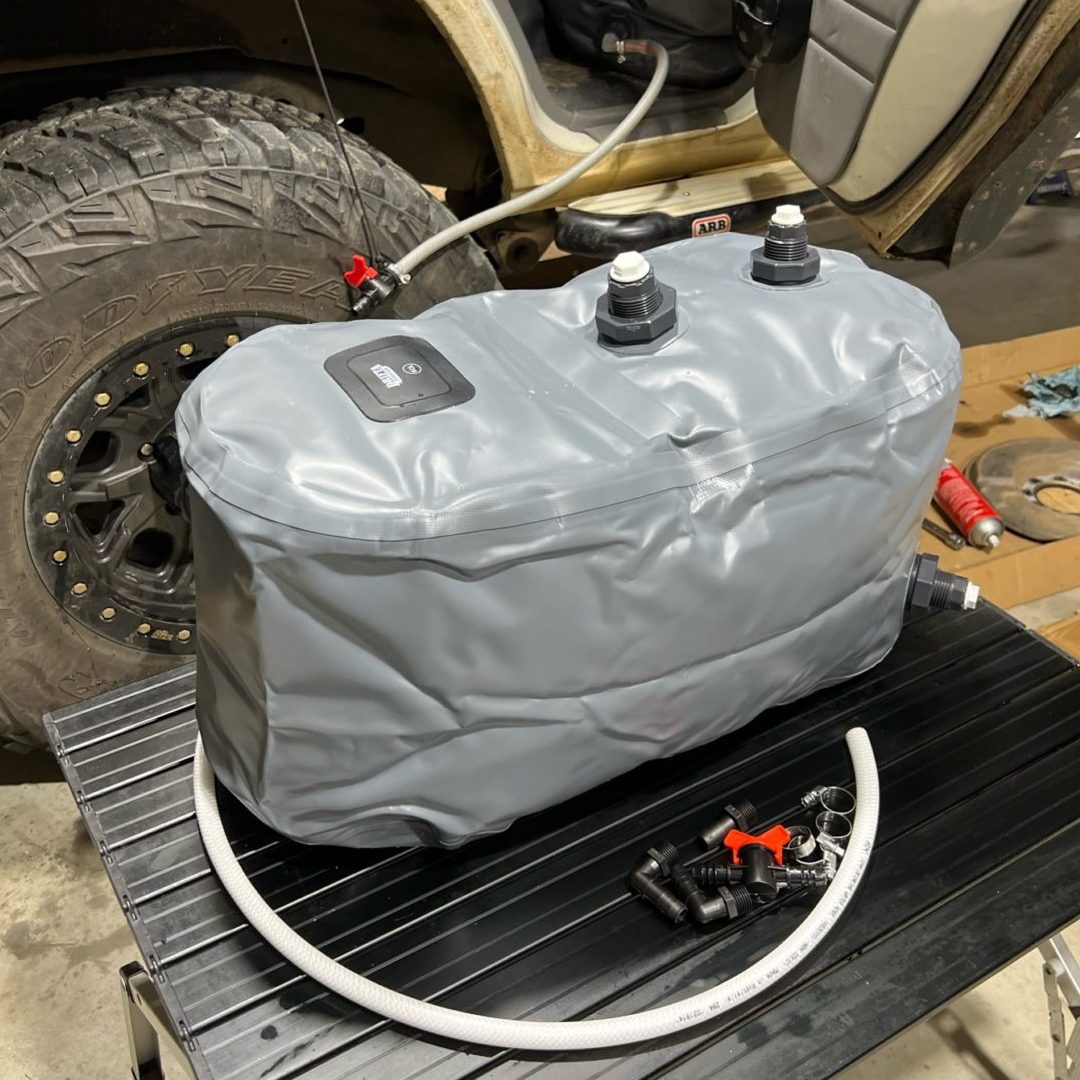
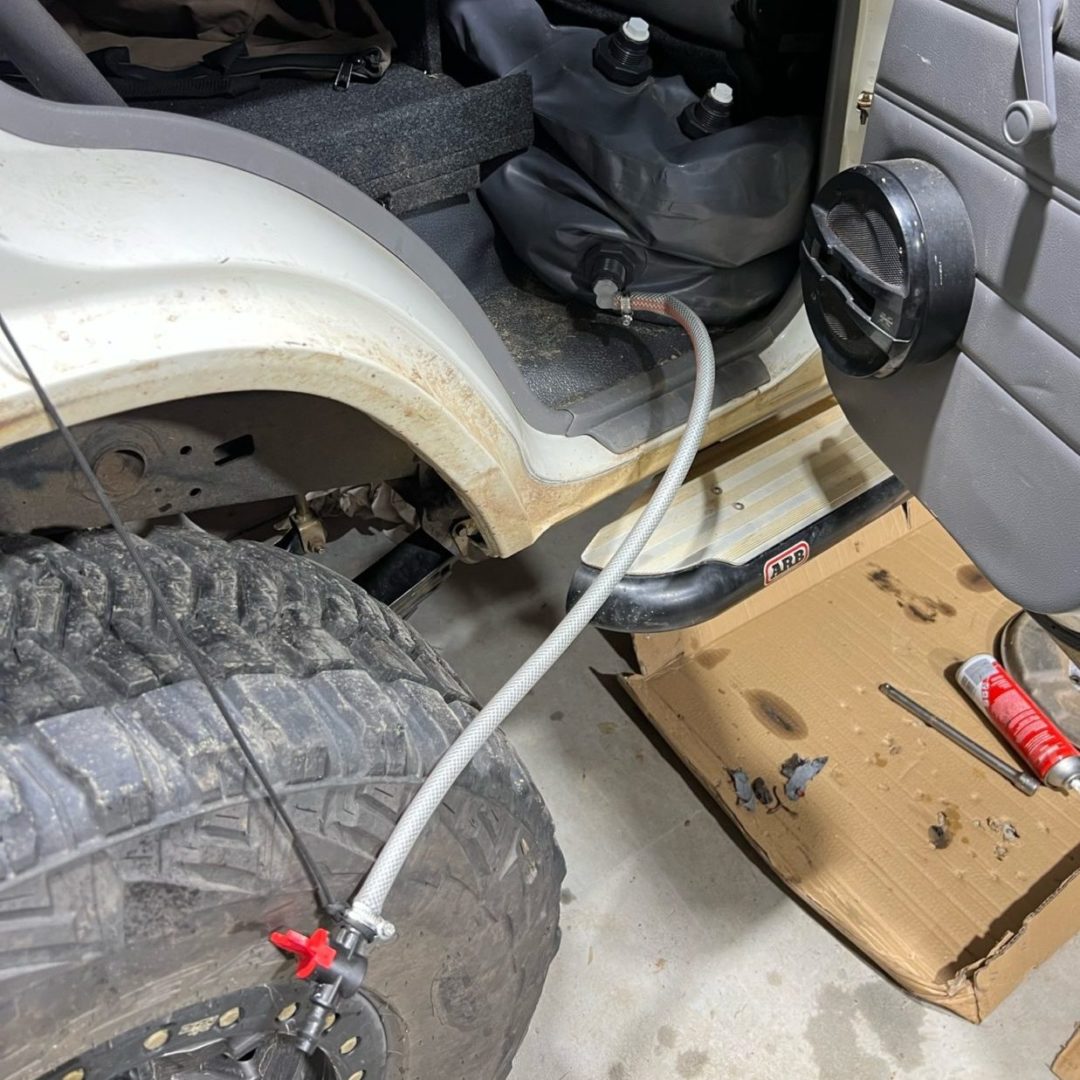
LTD Product Tips – Stockton 60L Water BladderThe Stockton pvc water bladder has two layers of pvc and a layer of fabric between. so 3 layers. it is super strong, and ideal to sit behind your seats on the floor well. No problems to put bags or other gear on top.
I tuck the hose up next to the seat belt, and I tied a short paracord and carabina, that I can use to hook onto the door catch, so the hose sits at a good height and doesn’t drop too far down.. (vids link below show this : ) fill up , you can undo the top breather/ filler, but mostly I blow water in via the outlet hose.. just take off the orange clip on hose fitting from your hose, and push straight on.. turn the black valve on, and turn on the tap.. easy as : ) don’t turn on full pressure, just fill slowly is fine.. won’t take long..
because it’s a bladder, and air tight, you don’t really need a breather, like in a fixed water tank.. as the volume of water drops, the bladder will shrink down in size.. so when you fill it again, it will just will back up to original size.. ie you don’t need to crack the breather each time you fill, just get the air out once is enough when you fill it the first time.. make sure the bladder is in exactly the right position when you start to fill it..
it’s a good idea to fill it, then adjust the position to get it right, not too far under the seat, not too close to the door.. once you fill full, it’s will be 60 kg and you won’t be able to move it or adjust the position..
the bladder states it’s “drinkwater safe”, and we have documents from the manufacture to state this.. but, I personally don’t use it for drinking water.. I use it for camp water.. washing, washing up, etc.. this is where you need the most volume of water. If I’m having a coffee or black tea, I want water without any taste at all , and I use either bottle water from servo’s, or mostly the 10 ltr cardboard bladder of drinking water.. bladder lasts us a week pretty much, and I carry a spare usually.. so up to 2 weeks. You can also buy these on the road.. when finished you can burn the box.. so that’s what I do.. although classed as drinkwater safe, all water stored in a plastic type container like a jerry can, water tank or bladder , will have some taste.. also, water will go stale, and it’s hard to totally empty and clean any water tank or bladder.. mainly tho, it’s hard to know exactly what water is going into it.. the water coming out is only as good as the water you put in..
95 % of the few issues we’ve had over the years, with dot trailer water tanks, drawers water tanks, are from contaminated water going in.. a common issue is algae or green slime in a garden hose.. you might fill up at a mates house, the hose might not have been used in a while, it’s in the tropical north, and there’s green slime all thru the hose, (I’ve done this on my first cape trip, bladder full of green slime)
turned out it was the garden hose.. so , make sure you flush the garden hose out, if it’s not your hose : ) but yeah this is where most water issues come from, from what is put into the bladder.. if you travelling, and filling up the bladder, you really can’t be sure the quality of the water you put in. out west, the water from servo’s is mostly bore water, etc.. this is why I use it for camp water only, which is the perfect way to carry a fair bit of water safely and easily.. and I use 10 ltr cardboard drink water bladder from the shops, for coffee/ tea water and for drinking..
I have been carrying 2 bladders on the last few trips, one behind each seat, one Darunee uses on the passenger side , and one on my side.. we got over 100 liters this way, and would last us 2 weeks easy, although we are very conservative with water, no running showers etc.. bath in the creeks or rivers when you can find them : )
There’s some tips, on the Drifta Stockton 60 ltr Water Bladder.. : ) LTD
60 LITRE WATER BLADDER INSTRUCTION
. Please follow the instructions below to assemble your bladder to get the best use from it.
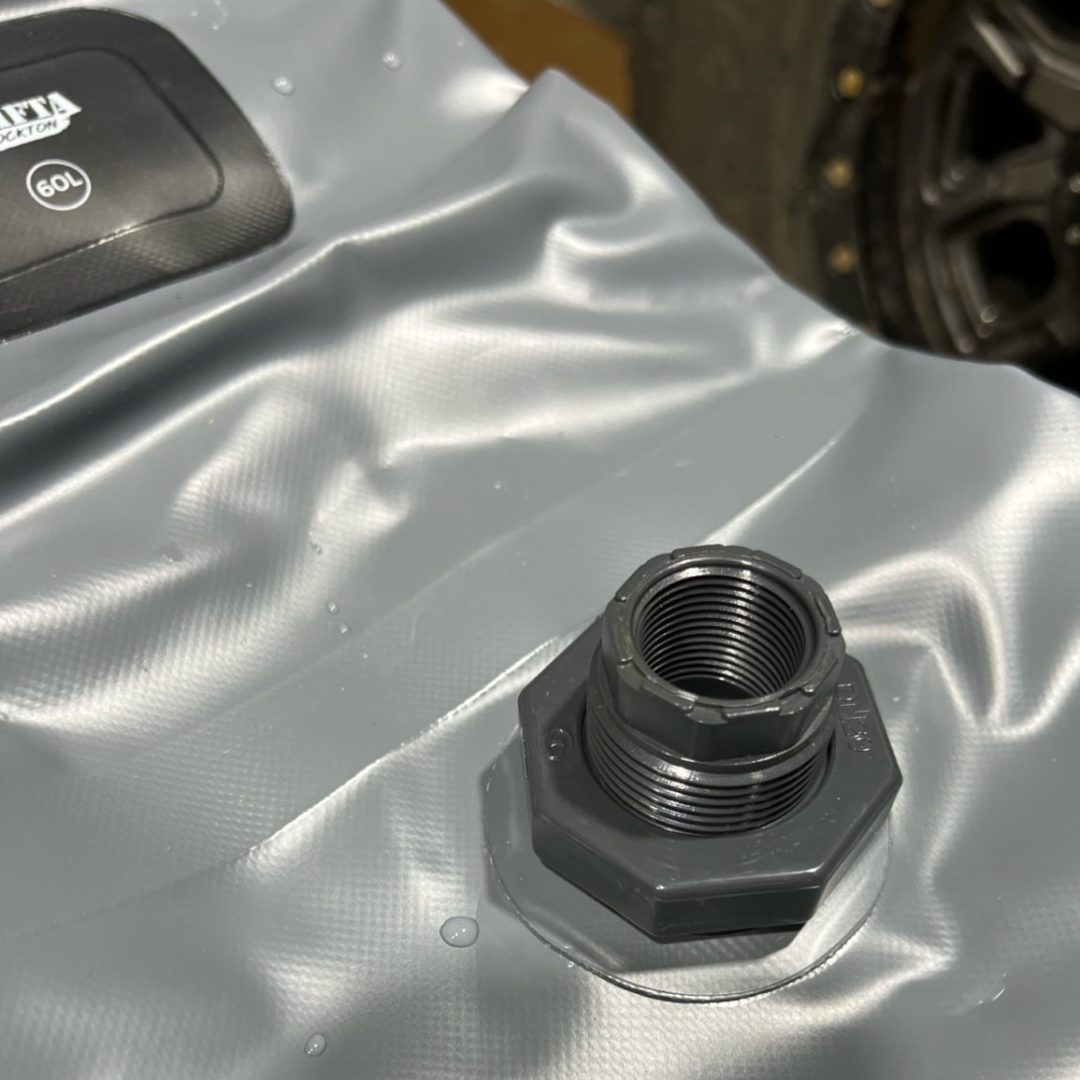
1. Fit 2 white bungs to the inlet and breather connections (see picture below). Ensure they are tight enough
to seal, but do not overtighten.
2. Fit an L shaped spigot to the outlet. The use of thread tape is recommended (not supplied) to ensure a
leak proof connection.
3. Next connect the hose to the L shaped spigot (heating the end of hose in hot water to soften it makes this
easier) and use a hose clamp around the spigot and hose to create a secure connection.
4. Now put another hose clamp over the hose and then fit the red handled tap to the hose. Tighten the hose
clamp around the connection.
5. You are now ready to use your water bladder.
To fill the bladder, open the inlet and insert a hose. Alternatively you can connect a hose to the spigot on the tap
and bottom fill the bladder. If needed you can open the breather to allow air out as you fill, but be careful to avoid
spills once the bladder reaches full. We supply additional fittings in case you would like to add a breather hose
(you will need to source your own food grade hose if you wish to do this). This will allow you to have the breather
hose overflow outside the vehicle when filling.
To use the bladder, simply ensure the tap is lower than the outlet and open the tap to let water flow out. There is
no need to open the breather when dispensing water as the bladder will deflate as the water is used.
If storing the bladder, we recommend that you drain the bladder and allow it to dry out by opening all of the
Share
